If you have just purchased a Minecraft Bedrock server with us you might want to upload the world you’ve been playing on so you can share it with your friends. If so you’ve come to the right place!
Note: This guide presumes that you’ve already got your world data from the device and can copy it to your server. I’ll write guides on how to do this on various platforms and link them here when they’re written.
Uploading a Minecraft Bedrock World With The Pterodactyl Panel
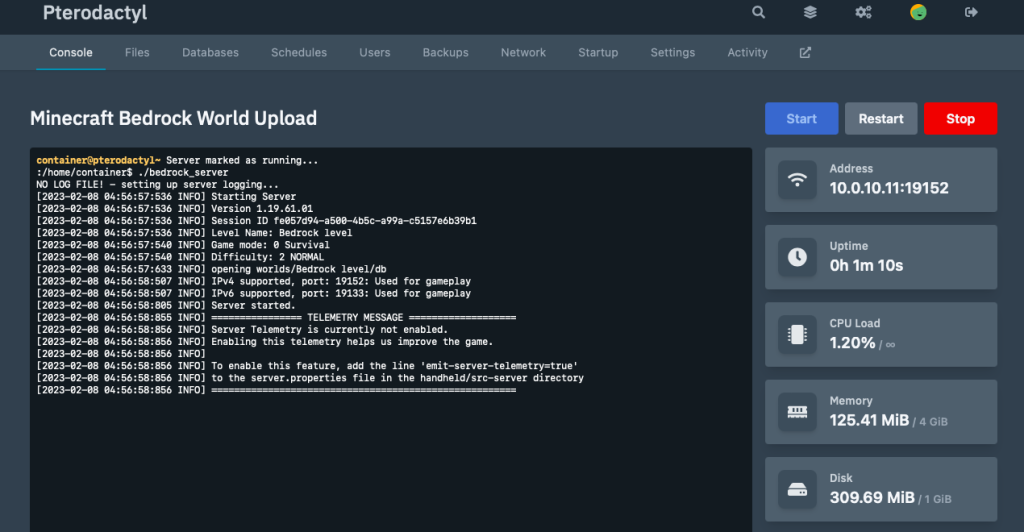
When you log in to your panel account you’ll find yourself at a page that looks like the following. On the page you’ll find your server name. Click on the link and you’ll be taken to the following screen.

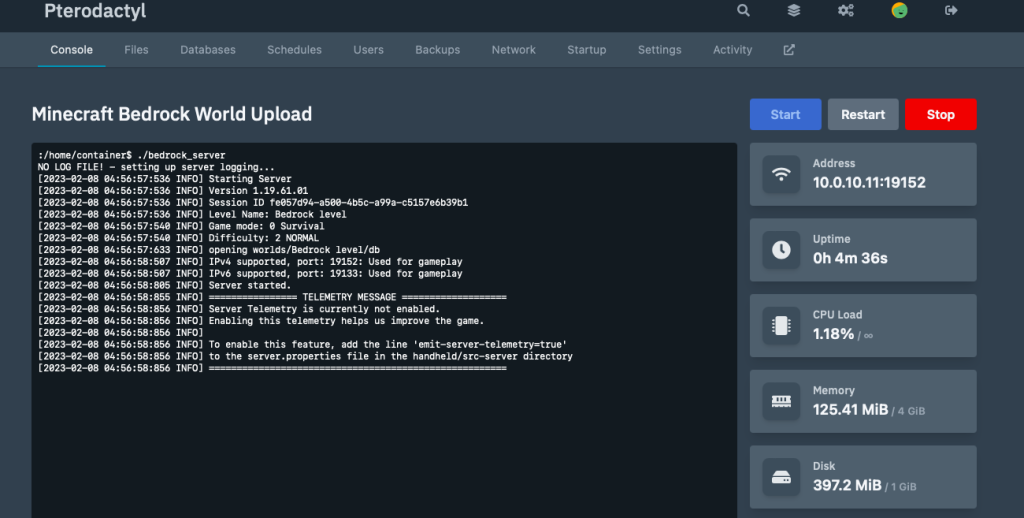
Here you’ll find a few things including the console where you’ll see the server log (where you can issue Minecraft commands outside of the game), buttons to control your server (start, restart, stop), and details about your server. While this is good info it isn’t what you came here for. Click on “Files” along the top of the page.
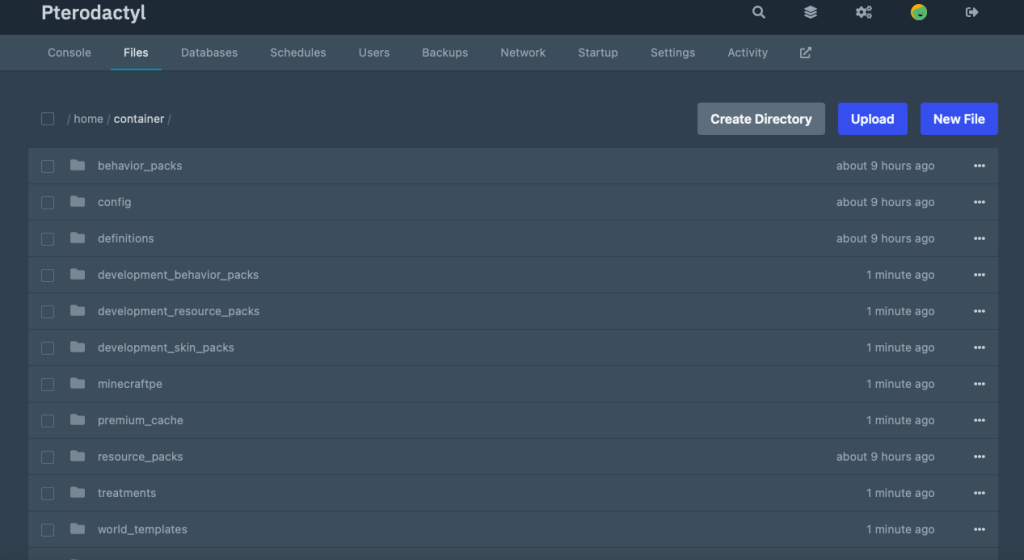
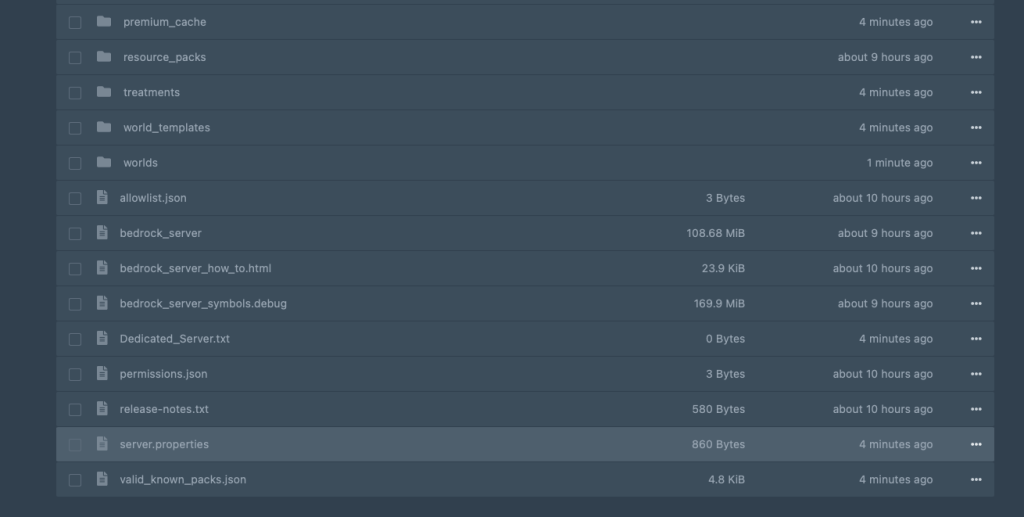
This page contains all of the files for your Minecraft bedrock server. Side Note: The “server” and the “world” aren’t the same thing. The server is what lets you connect to the world. The server contains the files for the world in the “worlds” folder.
Once you’ve clicked on the “worlds” folder you’ll find yourself at a screen that looks something like this. There will be a folder that has the the name of your world. All of the files for the current world on the server are there. From here click on the Upload button and select the directory for the world that you want to upload or the zip file containing your world’s files.

You’ll notice here that the I’ve uploaded a “tar” file (which is a variant of a zipped group of files). Once you’ve uploaded yours click on the three dots at the right side of the file and select “Unarchive”.
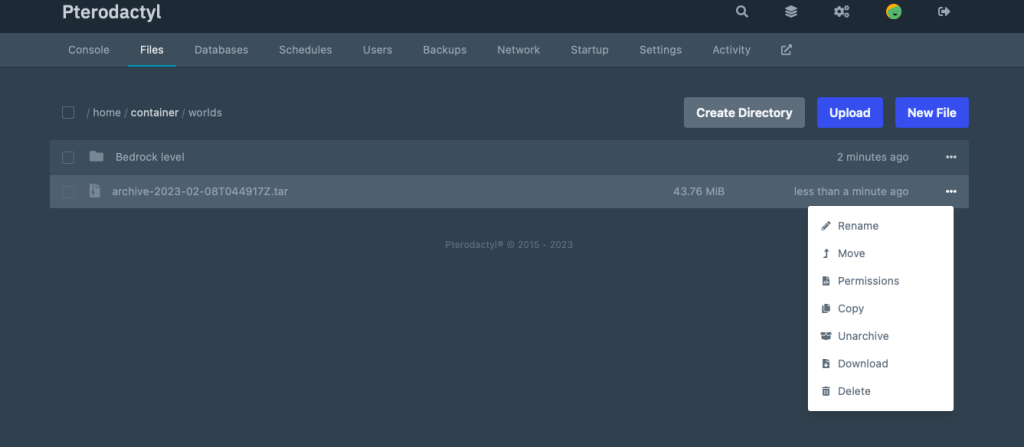
After Pterodactyl unarchives the file you’ll see that there’s a second folder now in the “worlds” directory. This folder contains the world that we want to have the Minecraft server actually load and put us in when we play. Write down or remember the name of the folder that contains the world that you’d like to use. You’ll need it in a few steps.

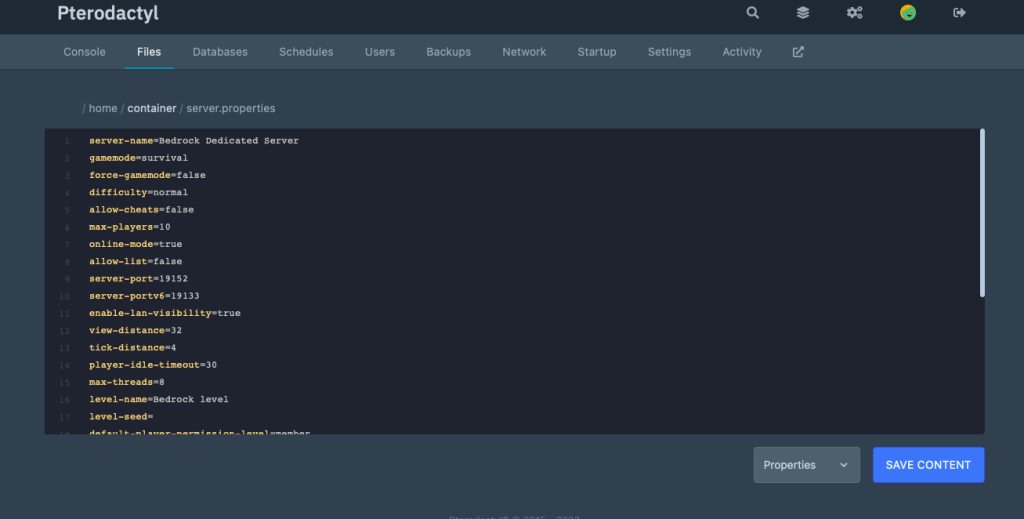
After unarchiving take a look at the top left of the screen. Under Pterodactyl and Console you’ll see that there is a line that says “/home/container”. Click on the word “container” and it will take you back up one directory level. We want to tell the Minecraft server to load the new world that we just uploaded. To do this, edit the “server.properties” file in the “/home/container” directory. Pterodactyl provides a screen to edit the file just by clicking on the file name. As such, click on server.properties.
The contents of server properties will load up. There are a lot of items here but don’t stress! These are all settings that tell the Minecraft server how to communicate with you. Find the “server-name” entry and change the value on the right side of the equal sign (‘=’) to the name of the new world folder that you uploaded. In the screenshot below you’ll see the server-name value at the top of the file and you can see that I updated the value to “Bedrock Dedicated Server”.
That’s it! That’s all the changes that need to be made. From here the only thing that needs to be done is to restart the server so that it loads the correct world. Click on “Console” and then click the “Restart” button.
Time To Enjoy Your World!
After uploading your world, modifying server.properties, and restarting the server it’s time to enjoy your world. Connect to your server again from Minecraft and enjoy! Please let me know if any of these instructions weren’t clear or if you run into problems.
