
Early in my career I had reason to use Vim when working on Linux based applications. I found that it made the editing, compile, test loop faster than it would be if I was editing on Windows. In recent years, however, many of the applications I have worked on have been either Windows based or embedded on a limited *nix box. The biggest I have missed about using Vim is the ability to do everything from the keyboard. With an ergonomic keyboard it was nice to not have to reach for the mouse. Even now many of the keybindings are burned into my muscle memory. Given all the above I decided to try Neovim to see if it scratches nostalgic itch for Vim.
Why Neovim Specifically?
There are a few reasons that I wanted to use Neovim:
- There are a lot of plugins available that are under active development
- There are a few plugin managers that make it easy to get functionality rivaling other GUI based IDEs
- It can be run on Windows as well as Linux
- It is a “new” fad in the Vim community given the number of guides available on Youtube.
Environment Considerations
Much of this setup will apply to anywhere you’re setting up Neovim. That being said it is necessary to explain where/why I’m installing Neovim. I’m using a fresh install of Ubuntu 24.04 running under WSL 2 on Windows 11. While I also use it in Windows I’ve been somewhat burned out on CMake WSL builds being kicked off from Windows and want to be able to just edit, compile, and test directly in WSL.
The warning I want to give specifically for Ubuntu is that apt has an old version of neovim. Using snap has a much more recent version. See below:
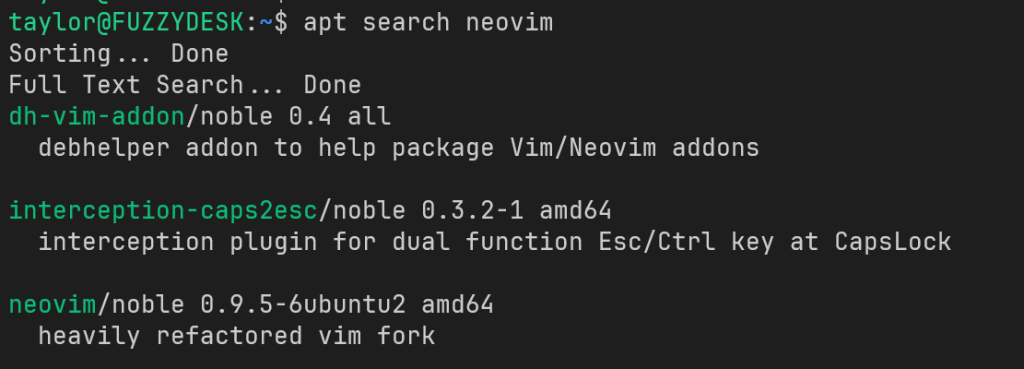
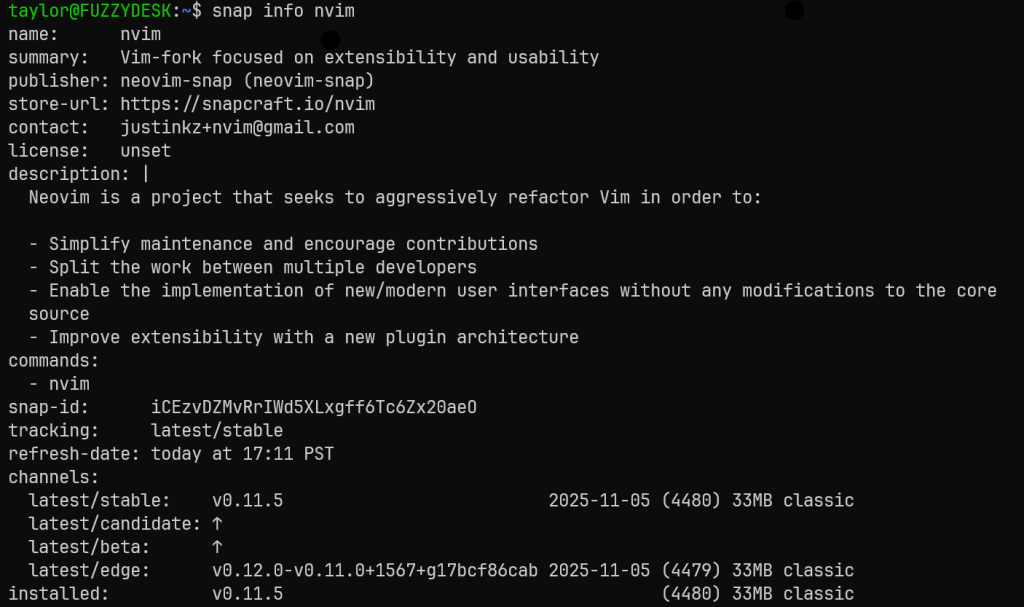
Additionally, because I’m using Linux/Ubuntu, the files are going under the ~/.config directory. If you’re not on Linux open nvim and run <code>:echo stdpath('config'). The result of this command will tell you the directory you need to put the nvim folder in. On Windows this is C:\Users\<username>\AppData\Local\nvim
Setting Up Lazy.vim
Lazy.vim is under somewhat active development and, as such, I decided to use it for the package manager for my install. The installation instructions can be found here though I’ll still walk through it in this post. This set of instructions uses a starter configuration whose files can be seen on Github here. I’ll endeavor to explain what is going on in these files.
Getting The Starter Configuration
If you’ve already got a NeoVim configuration you’ll want to back up your configuration, downloaded plugins, and state.
# required
mv ~/.config/nvim{,.bak}

# optional but recommended
mv ~/.local/share/nvim{,.bak}
mv ~/.local/state/nvim{,.bak}
mv ~/.cache/nvim{,.bak}Code language: PHP (php)
Next we want to get the config files that represent the LazyVim starter. Take note that, if you’re on a Windows machine you can’t refer to your home directory as ~. You may want to cd into your home directory and use .config/nvim in place of the directory to clone to.
git clone https://github.com/LazyVim/starter ~/.config/nvimCode language: PHP (php)If you want to commit your changes to a git repository you’ll want to remove the .git folder that points at Github. This has the same caveat as above for a Windows machine.
rm -rf ~/.config/nvim/.gitCode language: JavaScript (javascript)Start up nvim and you’re good to go! When you start up nvim you’ll see the Lazy screen that allows you to see what plugins are loaded, check for updates, etc. You can get out of this by pressing q. You can bring it back up by typing :Lazy or typing <leader>l where the leader character is the space character by default in LazyVim (more on the leader character later).
Side Note About Starter Projects
One thing I do want to note here: I’m not a huge fan of starter projects like this but I’ve been around long enough to know that it’s helpful. What you’ll notice with LazyVim is that they recommend using the lua/plugins directory under your config directory to setup which plugins you’d like to use. HOWEVER! The plugins that come with the starter are NOT all setup under this directory. They’re hidden by LazyVim’s own set of plugins and the config files for these plugins are not in the .config directory; they’re hidden in the .local directory. If, for instance, you want to use Neo-Tree for a file explorer instead of Snacks Explorer that’s fine but Snacks Explorer gets automatically installed with the starter. You’ll have to do some mucking with the config files to disable Snacks Explorer.
Plugins – Where the magic happens
From here we still have one more thing to setup; the plugins we want to use. There are tons of plugins available in addition to the ones that LazyVim bundles. First, however, we have to know how to configure these plugins
Where Are My Configuration Files?
As mentioned earlier, the LazyVim starter comes with Snacks Explorer by default. This can be opened by pressing <leader>e. Side Note: When you press the space key a small menu will pop up showing you the options you have. As you can see here we have three main directories:
- .config/nvim
- .local/share/nvim
- .local/state/nvim
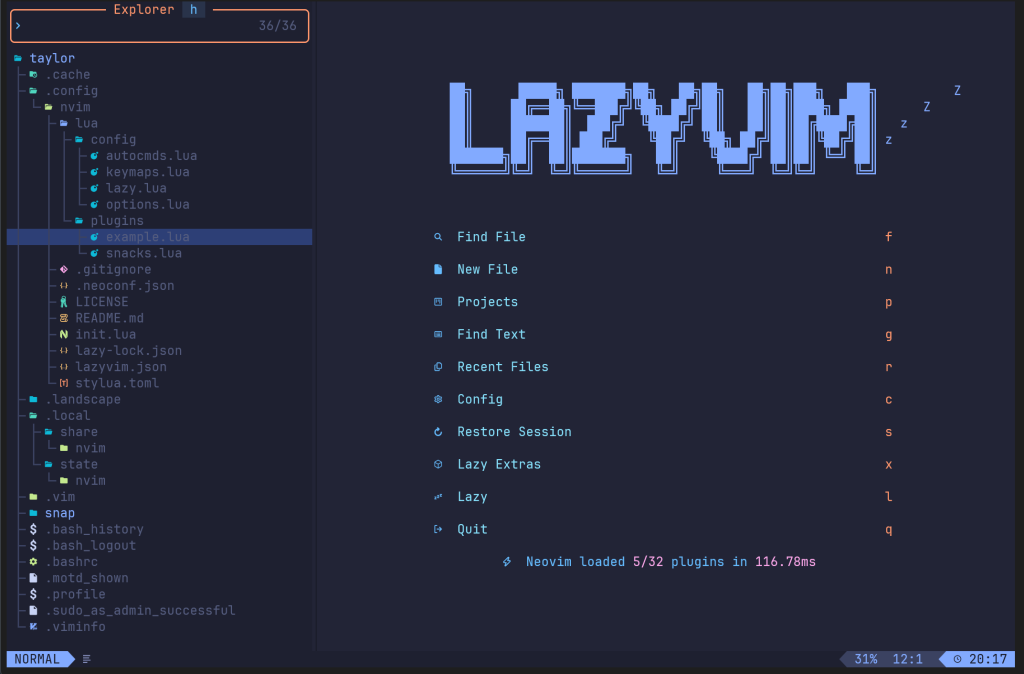
The most interaction we will have, however, will be in the .config directory. I’ve expanded it to show the lua/config and lua/plugins directories.
Important Files
.config/nvim/init.lua- This is/would be the main configuration file for nvim in a configuration without LazyVim. With LazyVim, however, the only thing it’s going to do is tell nvim to load LazyVim.
.config/nvim/lua/config/lazy.lua- This is the main configuration file for LazyVim itself.
.config/nvim/lua/pluginsfolder- Under here we’re going to create separate lua files for the plugins we want to use. Technically all the lua files here will get rolled up into a single file by nvim. Breaking up the configuration by plugin, however, makes each file more readable by being specific to the plugin in question.
Conclusion
This is really only the setup of Neovim for me. As I use it more I know there will be more plugins I find that I need as well as tools to setup to make the functionality that comes with LazyVim work. I hope you found this helpful. Stay tuned for more!
